Start a Conversation

Solved!

Go to Solution

1 Rookie

 • 

4 Posts

215

March 8th, 2024 06:18

Precision 5820 Tower Update TPM 1.2 to 2.0

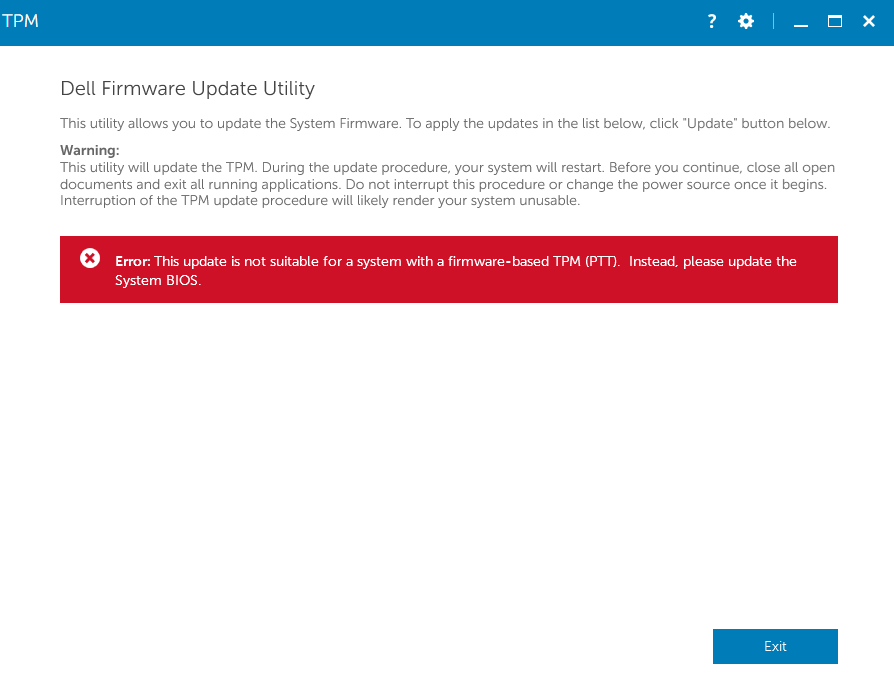
I want to update the TPM from version 1.2 to 2.0 for my Precision 5820 Tower. I have already updated the BIOS to the latest version, which is 2.34.0 (Release date 02 Feb 2024). However, I received the following error message: ‘Precision 5820 Tower + Error: This update is not suitable for a system with a firmware-based TPM (PTT). Instead, please update the System BIOS.’

Has anyone encountered a similar issue and knows how to resolve it?

This is the TPM 2.0 version that I have used: 7.2.2.0, A02.

7 Technologist

 • 

12.1K Posts

March 8th, 2024 14:11

According to this Dell support page, the 5820 must first be updated to the latest BIOS version. Also make sure you have TPM 1.2 enabled in the BIOS under the Security heading. Also instead of running the update file you are trying to run, which is an update for systems that already have TPM 2.0. , try this update instead. Click on the read more in the file description.

(edited)

1 Rookie

 • 

4 Posts

March 8th, 2024 17:43

Thank you for your prompt response! I successfully upgraded from TPM 1.2 to 2.0. As you mentioned, it seems that the latest TPM version is intended for updating from TPM 2.0, not for upgrading from 1.2 to 2.0.

However, even after updating to TPM 2.0, I still cannot successfully update to the latest TPM version (Version 7.2.2.0, A02). Upon running the update, I receive a success notification (window), but when the system requests a restart to finalize the TPM update, I get a message saying the update was unsuccessful, and the system restarts. I suspect I may need to use older versions before updating to the latest version.

Nevertheless, I appreciate your assistance! 🙌🏼

6 Professor

 • 

7.5K Posts

March 9th, 2024 03:39

@JOcean​ 

Thanks to your post and 2nd link, I didn't know Dell was still releasing BIOS for the 3620; Sep., Nov., and Feb. to be exact after I bought my 3620.

(edited)

March 9th, 2024 18:02

@Ahn Nguyen​ 

Great I was looking for the same information! Just got a 5820 and want to install windows 11.

Did you run thru the steps and execute the update from windows 10?

Thanks all for the great information!

6 Professor

 • 

7.5K Posts

March 11th, 2024 02:22

Clean install is best if Win10 is telling you in Settings > Update & Security that the PC doesn't qualify for Win11.

1 Rookie

 • 

4 Posts

March 12th, 2024 05:33

@CNC_Prog_Master​ I successfully updated from TPM 1.2 to 2.0. And in Settings > Update & Security section, it said my computer is ready to install Windows 11. Here are the steps I took: first, I updated to the latest BIOS version, which is 2.34.0. Then, I used the update version from TPM 1.2 to 2.0 HERE to update to TPM 2.0 (the latest version probably used for updating TPM 2.0 rather than updating from 1.2 to 2.0)

When updating BIOS and TPM, make sure to carefully read the instructions and follow the steps. I've seen some people have their motherboards damaged after updating BIOS. So, if your computer is still under warranty, it's better than if it's out of warranty.

Here's the TPM update guide:

Note 1: You must provide a bootable DOS USB drive. This executable file does not create the DOS system files.
Note 2 : Before updating the BIOS, ensure that you suspend BitLocker encryption on a BitLocker-enabled system. If it is not enabled on your system, you can ignore this step. For information about how to disable BitLocker, see How to Enable or Disable BitLocker with TPM in Windows at support.dell.com.
Note 3: The TPM must be ON and Enabled in BIOS Setup, and the TPM must not be owned. If the TPM is owned, go to BIOS Setup and clear the TPM before proceeding. You may need to run TPM.msc to reinitiate the TPM under Windows operating system.
Note 4: When the TPM ownership is cleared, some operating system will automatically take ownership of the TPM on the next boot (TPM AutoProvisioning). This feature must be disabled in the operating system to proceed with the update.

Dell TPM Update Utility for Windows/DOS

Download
1. Click Download File.
2. When the File Download window is displayed, click Save to save the file to your hard drive.

Clear the TPM (See Notes 2, 3 and 4)
1. Before running the TPM update utility, clear the TPM Owner.

Disable TPM Auto Provisioning in Windows (See Note 4)
1. Boot to Windows
2. Launch the PowerShell Command window in Administrator mode.
3. At the Powershell command prompt, start the command:
> Disable-TpmAutoProvisioning
4. Confirm the following results:
- AutoProvisioning: Disabled
5. Reboot the system, to BIOS Setup by pressing F2.
6. Go to Security > TPM 1.2/2.0 Security.
7. Click the Clear checkbox and select Yes to clear the TPM settings. (You can skip it if the item is disabled)
8. Click Exit to save changes.
9. Reboot system to Windows.
10. Confirm that the TPM is not owned. The TPM should no longer be automatically provisioned by Windows.
11. When the TPM update is finished, launch the PowerShell command in Administrator mode to reenable the auto provisioning.
> Enable-TpmAutoProvisioning
12. Confirm the following results:
- AutoProvisioning: Enabled

Updating the TPM update utility from Windows environment
1. Browse to the location where you downloaded the file and double-click the new file.
2. Windows System auto restarts and updates the TPM during the system startup.
3. When the TPM update is finished, the system auto reboots to take effect.

Updating the TPM update utility from DOS environment, with Legacy Boot mode (Non-Windows users)
1. Copy the downloaded file to a bootable DOS USB drive.
2. Power on the system, then Press F12 key and Select USB Storage Device and Boot to DOS prompt.
3. Run the file by typing copied file name where the executable file is located.
4. DOS system auto restarts and updates the TPM during the system startup.
5. When the TPM update is finished, the system auto reboots to take effect.

Updating the BIOS from DOS with UEFI boot mode enabled (Non-Windows users, Load Legacy Option Disabled)
1. Copy the downloaded file to a bootable DOS USB drive.
2. Power on the system, then go to BIOS Setup by pressing F2 and go to General > Boot Sequence > Boot List Option.
3. Change UEFI to Legacy of Boot List Option.
4. Click Apply, click Exit to save changes and reboot system.
5. Press F12, then Select USB Storage Device and Boot to DOS prompt.
6. Run the file by typing copied file name where the executable file is located.
7. When the TPM update is finished, the system auto reboots to take effect.
8. Go to BIOS Setup by pressing F2 and go to General > Boot Sequence > Boot List Option.
9. Change Legacy to UEFI Boot Option.
10. Click Apply, click Exit to save changes and reboot system. 

(edited)

No Events found!

Top